After making changes to objects in either a parent or child release, you can start a merge operation to apply the changes to the other release.
- Select the source object in a release whose changes you want to merge into its parent or child release.
You can select the entire release, or any lower-level object within the release, such as a folder, a structured document, or an image file.
- Right-click the object and select .
The
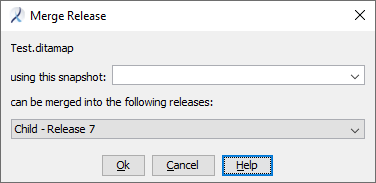
Merge Release dialog appears.
The dialog identifies the source object you have selected to merge.
- If you want to specify a snapshot label to control the version of changes to merge, select one from the using this snapshot: list or type in the text of a label.
Important: This is different than all other operations such as composition and export where a object will inherit a snapshot label from the first object referencing the object. During a merge, snapshot labels are not inherited by other objects. If start merge specifies a snapshot label, each file and document being merged is filtered with that label name independent of all other files and documents being merged.
The surest way to get predictable behavior is to attach snapshot labels explicitly to all objects in a release that will be the source of a merge. See Adding a Snapshot Label.
- Select the target release from the list where the changes will be merged.
A target release is the immediate parent or child of a release that has been branched. In many cases there is only one target release in the list. However, if the source object selected in Step 1 is a parent release that was branched more than once, the list may contain more than one child target release to merge into.
- Click OK.
A batch job is submitted to start the merge. Upon completion, you will receive an email. Click the link in the email and a
Merge tab opens in the Workbench.
The objects that are candidates for merging appear in a list with check boxes by each. If the list is empty, there are no objects to merge.
Note: If a check box is initially cleared, the Problem column may provide details about why its changes will not be merged. For example, if the object is locked, or if it already has a merge in progress, it cannot be merged.
- Ensure the check boxes are selected on objects you want to include in the merge operation.
If desired, clear the check box by any object to remove it from the merge operation.
Note: You can perform another merge later on the same objects to include changes from objects removed from this operation.
If the checked merge candidates are not what you want to merge, click Cancel Merge to cancel the operation.
- To proceed with the merge operation, click Start Merge.
A confirmation of the start of the
merge operation appears. The message indicates whether or not the operation
resulted in conflicts, and instructs you to examine the changes or conflicts in
the My Merge Changes view.
Additionally, the
Merges folder for the username who issued the Start Merge
command (in the Administration cabinet's Users
folder) is populated with merge objects. You can optionally remove an object
from the merge operating using the Merges folder. See
Removing an Object from a Merge.
- Click OK to proceed to the My Merge Changes view.
 The objects that are candidates for merging appear in a list with check boxes by each. If the list is empty, there are no objects to merge.Note: If a check box is initially cleared, the Problem column may provide details about why its changes will not be merged. For example, if the object is locked, or if it already has a merge in progress, it cannot be merged.