This task describes how to run a report, not limited to a selected scope of the repository.
- Navigate to the report design file of interest in the Administration cabinet's Reports folder, then right-click the file and select Administration > Run Report.Do not select a scoped report file name. Scoped report file names begin with scoped.The Run Report dialog appears.
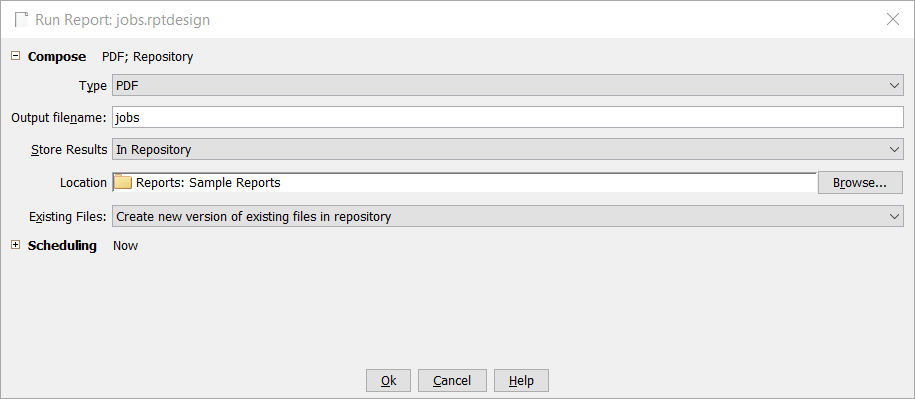
- Select the report format Type.See Report Formats.
- Specify the Output filename.By default, the filename is the name of the report design, with the object name appended. You can change the name to whatever you want. You can also use Java formatting to create a unique report name, such as for scheduled report jobs. See Creating Unique Report Names.
- Specify the location to Store Results from the list.The In Repository option stores the output file in the repository. You must specify these additional fields:
Field Description Location Browse to and select the folder where the output file will be located. Note: Many folders in the Administration cabinet restrict users from creating or importing folders or files. If you select one of these folders, the job will fail.Existing Files Specify how to manage existing files: - If you select Overwrite existing files in repository, only the current version of the output file is maintained in the repository. Older versions of the output file are permanently destroyed.
- If you select Create new version of existing files in repository, Astoria creates a new version of the output file, allowing you to roll forward a previous version, if necessary.
The To FTP option stores results to an FTP server. You must specify these additional fields:Field Description FTP Server Enter the name of the FTP server to which you would like the output file to be delivered. For example, ftp://ftp.yourcompany.com. FTP Directory Enter the directory path to the folder on the server to which you would like the output file to be delivered. For example, uploads/maps/mymap. This folder must already exist on the FTP server. If it does not, the job will fail.
Username Enter the username used to log into the FTP server. Password Enter the password used to log into the FTP server. The To SFTP option stores results to a secure FTP server. You must specify these additional fields:Field Description SFTP Server Select the SFTP server to which you would like the output file to be delivered from the drop-down list. SFTP Directory Enter the directory path to the folder on the server to which you would like the output file to be delivered. For example, uploads/maps/mymap. This folder must already exist on the SFTP server. If it does not, the job will fail.
Username Enter the username used to log into the SFTP server. Password Enter the password used to log into the SFTP server. The To HTTP(S) option stores results to a URL location. You must specify these additional fields:Field Description HTTP(S) URL Enter the URL location to which you would like the output file to be delivered. For example, http://myserver.com/output/productHelp2.0.pdf. Note: This must be a complete URL to the file to be stored, not just a URL to a directory.Username Enter the username used to log into the URL location. Password Enter the password used to log into the URL location. The On Server option stores results on the Astoria Communication Server. This option is available for On Premises customers who want their output to be processed and/or delivered to another application that will watch a server directory. With On Demand customers, the On Server option does not allow a user to specify a location on their local computer.You must have permissions to create folders in the directory you specify. You must specify this additional field:Field Description Server Directory Enter the directory path to the folder on the server to which you would like the output file to be delivered. For example, c:\temp\astoriaoutput
Note: This option will only appear if you are a direct or indirect member of the Astoria Administrator's group. - If desired, select Scheduling options.
- Click OK.
The report is run as a background job. You will receive an email notification when the job completes.