An administrator can create or modify target language cabinet groups to simplify selecting a group of cabinets when starting a translation rather than explicitly selecting each one.
- Select the parent location that contains target language cabinets.
- If you are using Release Management, this is a Release object (
 ).
).
- If you are working in the regular cabinets of the repository, this is the Cabinets icon (
 ) in the Navigation view.
- Right-click the object and select .
The
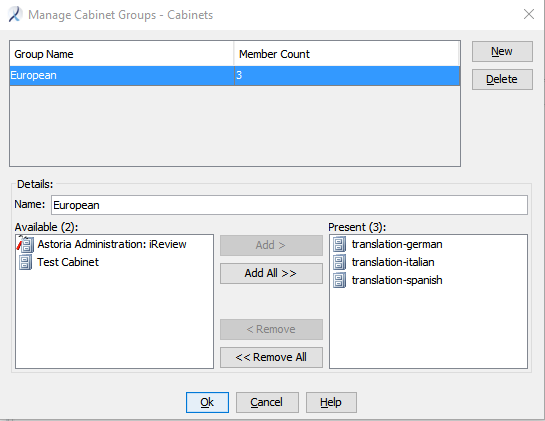
Manage Cabinet Groups dialog appears.
The dialog's title indicates the parent location you selected.
- Click New, and enter a Name for the group.
The group name could indicate a collection of similar languages or language_locales, a geographic region, or a product or business unit, for example.
The Available area lists the target language cabinets that can be included in the group.
- Add cabinets from the Available area to the Present area to make them members of this group.
If you are developing content in multiple source language cabinets, you can add source language cabinets to the group. However, the translation workflow recognizes a source language cabinet for a selected object and will not process translations into the original source language cabinet if it is in a group selected for a translation job. See
About the Source Language Cabinet.
As you add cabinets, the Member Count column increments to show the number of members in the group.
- Create additional groups as desired.
A target language cabinet can be a member of more than one group.
- Modify the members in a group or delete a group name as desired.
- Click OK.
The group is created in the repository. When a user issues the Start Translation command, they can select a group of target language cabinets for the job.