A system administer creates filter objects, which can be used for conditional processing commands.
Filters rely on constraints defined in the FilterConfig.cfg file located in the Administration cabinet. Ensure you have defined all constraints and their attribute values you will need before you create a filter.
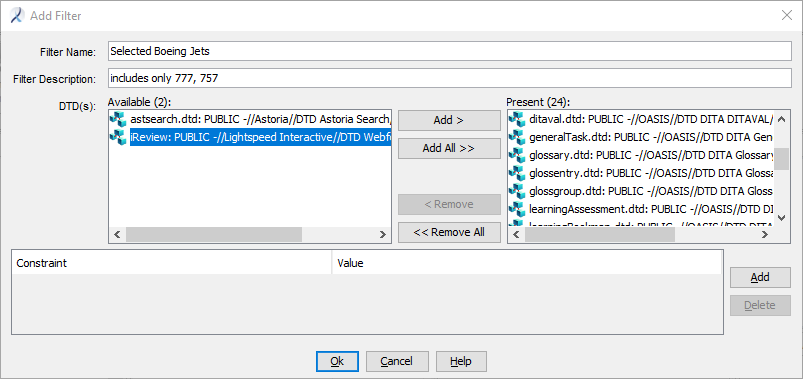
- In the Workbench Ribbon, select .The Add Filter dialog appears.
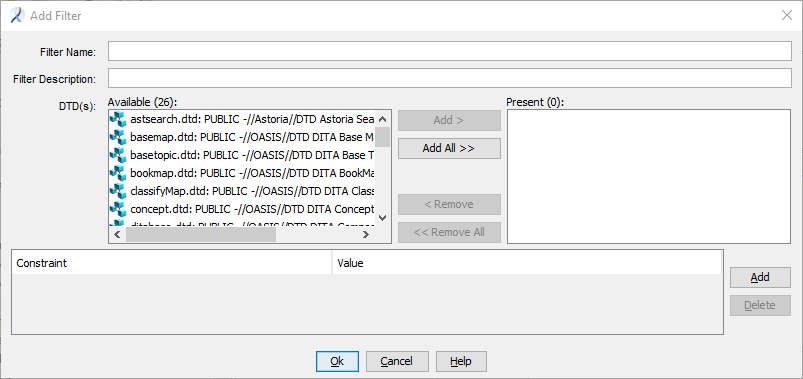
- Select the DTD(s) this filter will apply to by adding them from the Available box to the Present box.
- In the new row's Constraints column, click the row's Constraint field and select a constraint name from the drop-down list, then click in the row's Value column.The Edit Filtering Attribute dialog appears. The dialog displays the hierarchical structure for the attribute value as defined in the filter configuration file. If necessary, click
 to expand the available attribute values.
 - Select the constraint values for this filter.Tip: If your system is configured for hierarchical taxonomy, you can select a container name that is not an actual attribute value, but is defined as a label in the filter configuration file (the Not selectable? check box is selected) to cause all descendent attribute values to be applied. See About Hierarchical Filter Constraint Values.
- To select Include values, click the right side of the selector icon so it turns green.
- To select Exclude values, click the left side of the selector icon so it turns red.Note: You cannot select Exclude values if your system is configured to suppress Exclude filtering attributes. See Suppressing Exclude Filtering Attributes.
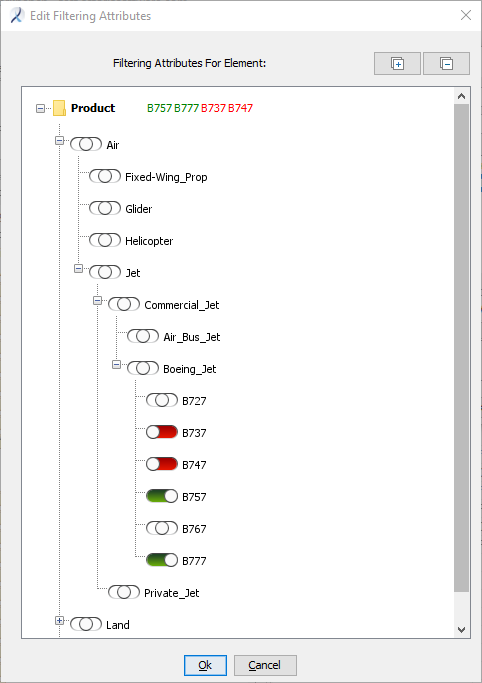
- Click OK.The Edit Filtering Attribute dialog closes and the constraint values you added now appear in the Constraint row of the Add Filter dialog. Exclude values, if present, are prefixed with the character specified in the Exclusion String field of the application document.

The filter is saved in the Filtering\Filters folder in the  Administration cabinet.
Before the filter can be used, you must identify where it can be available for use. See Make a Filter Available for Use.