If the Merge Started confirmation indicates conflicts in the results, you must resolve them before completing the merge operation.
The My Merge Changes view Changes pane displays the candidate merge objects for the merge operation. Expand the change object. Changes marked with the conflict icon ( ) indicate changes that were made in both the source and target object and are a conflict
that must be resolved.
) indicate changes that were made in both the source and target object and are a conflict
that must be resolved.
) indicate changes that were made in both the source and target object and are a conflict
that must be resolved.
Tip: Clear the check boxes at the top of the Changes pane, then select the Unresolved Conflicts check box to display only conflict changes.
- Expand each merge object to see the conflicts that have been found.
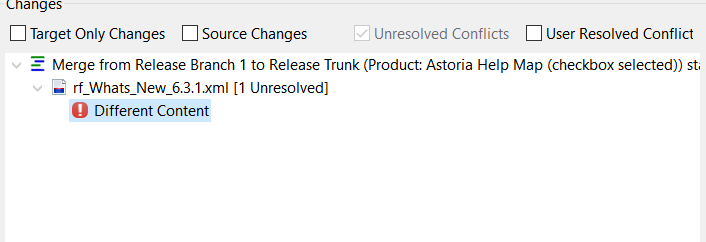
- Select a conflict, such as Different Content.Below the Changes pane, the Detail pane displays details about the conflict, such as the type, the element name, and a description of the conflict. Below that are options to resolve the conflict.
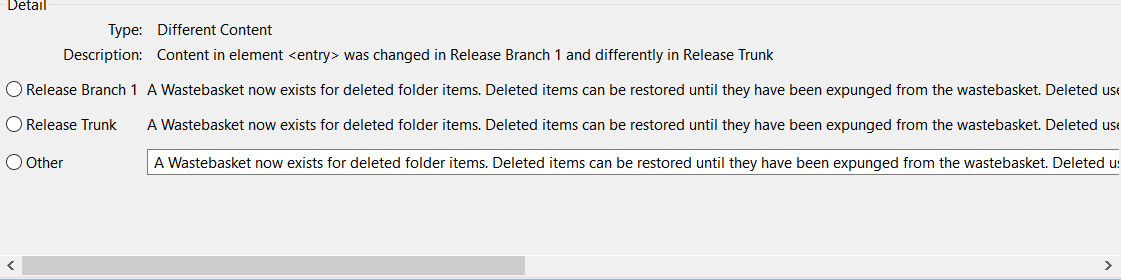
- Select the desired option to resolve the conflict.In this example, the available options are:
- Content from the element in the source release (Branch 1).
- Content from the element in the target release (Trunk).
- Other, which allows you to modify a text block to merge into the target release element.Note: Not all conflict types provide the Other option. For example, conflicting referenced image files would not display the Other option.
When you select an option, the right pane displays a browse view of your selected option. In the browse view, the element with the change is highlighted.
In the Changes pane, the conflict icon changes to a resolved conflict (
 ).
).
You can now complete the merge operation.