When you click OK in the Merge Started confirmation, the My Merge Changes view appears.
Note: If you have closed the My Merge Changes view in your Workbench, open it by clicking  in the Workbench toolbar and selecting My Merge Changes. The view opens in the Workbench.
in the Workbench toolbar and selecting My Merge Changes. The view opens in the Workbench. 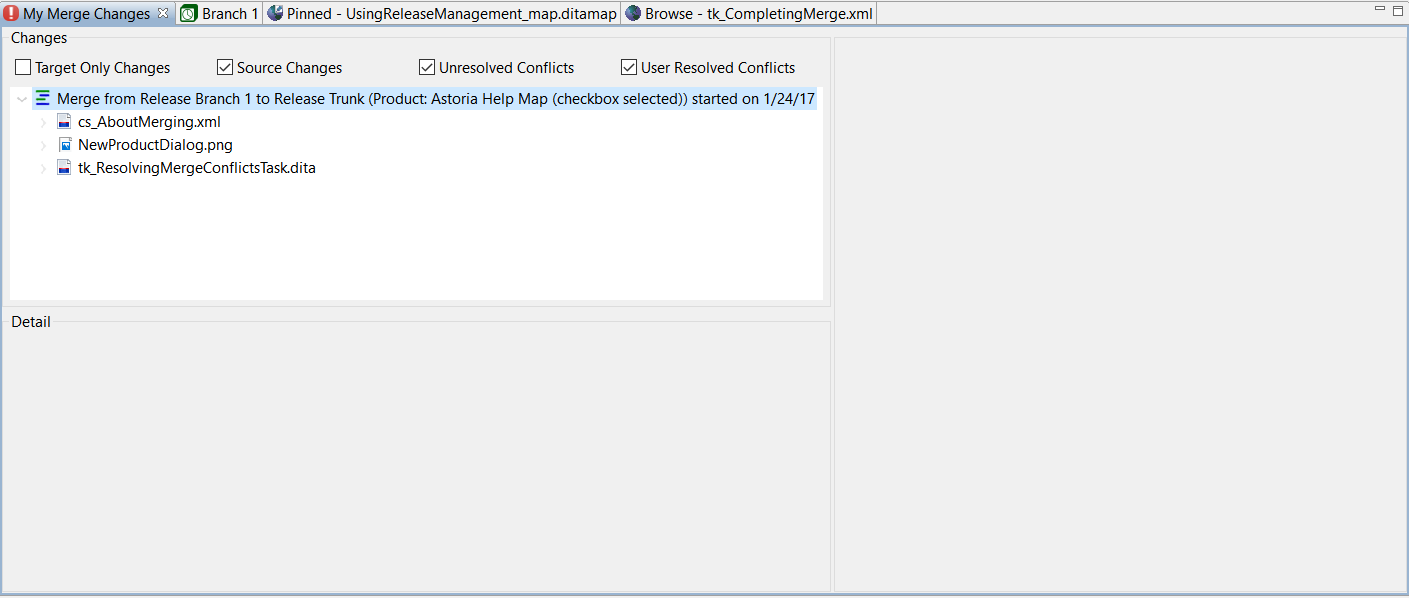
Tip: To make it easier to work in the view, maximize it by double-clicking the view tab or clicking  in the view toolbar.
The Changes pane shows the candidate objects for the merge. Check boxes at the top allow you to filter the candidate objects for changes and conflicts.
If necessary, expand the top-level merge line ( ) to show the candidate merge objects. Merge objects are identified by the icon for their type, such as a structured document, map, or file.
- Expand each merge object to see the changes found by the merge operation.A list of changes for the merge object appears.
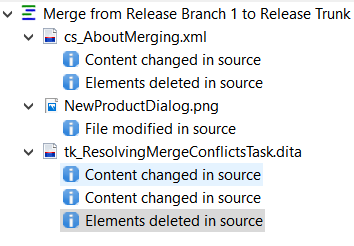
- Changes marked with the information icon (
 ) indicate changes that are not conflicts.
 - Changes marked with the conflict icon (
 ) indicate changes that were made in both the source and target object and are a conflict that must be resolved.
- Changes marked with the information icon (
- Select an informational change from the list.The Detail pane indicates the type of change and describes the change.

A browse pane to the right shows an HTML view of the merge object that will be changed. If an element's content was changed in the source, the browse view highlights the changed element.
Note: You can select a merge object (such as a structured document, map, or file) from the list and in a context menu or the Workbench Ribbon Merges tab execute the Locate Source or
  Locate Target command to further investigate the changes.