You can add an annotation to a repository object by clicking an icon in a Browse view or the Reviewer interface, using a Workbench context menu command, or through an integrated XML editor repository menu command.
- To add an annotation to a structured document element from the Browse view or Reviewer interface, click the comment icon (
 ) at the top of the window, then drag and drop the resulting box onto the element on which you want to attach the annotation.The element is highlighted and a dialog box appears.
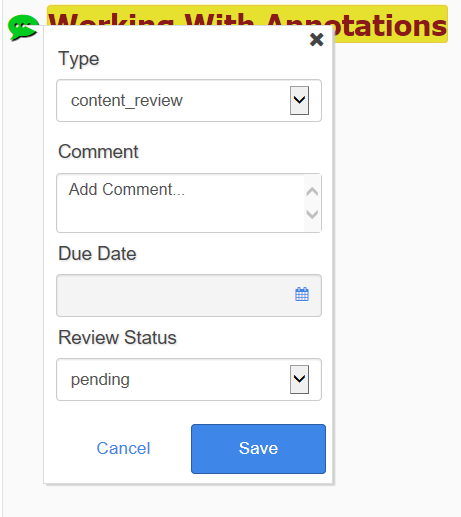
The fields that appear in the dialog vary, depending on the definition of the annotations in your repository.
- Click Save.The annotation is saved in the repository. A green annotation indicator icon (
 ) appears to the left of the annotated element. A comment box displaying the user who made the comment, the date and time the comment was added, and the annotation summary text, appears in the right margin of the window.
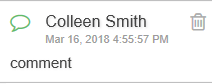
- Click Save.
- To add an annotation to a folder object or document element using a Workbench context menu command, or to a structured document element using an integrated XML editor repository menu command, select the object or element for the annotation and open the Annotations dialog.
Option Action Workbench context command - Navigate to the object or element in the Navigation view or a Details view.Note: If your system is not configured to allow annotations on the selected element name, an error message will be issued when you try to add an annotation. For example, if your system is configured to allow annotations only on elements that contain text, you cannot set an annotation directly on a step element, because the step element is only a container for lower-level elements. Instead, you must expand the step element to the command element or other lower-level element that contains text. See Annotation View Options.Note: Annotations placed on a structured document filename are not visible in a Browse view or in the Reviewer interface. Instead, expand the structure in the Navigation view and select a document element, such as the title.
- Right-click the object and select .
integrated XML editor Place your cursor in the element of interest and select . Or select the Get Next Annotated Element command from the repository menu. The Annotations dialog appears.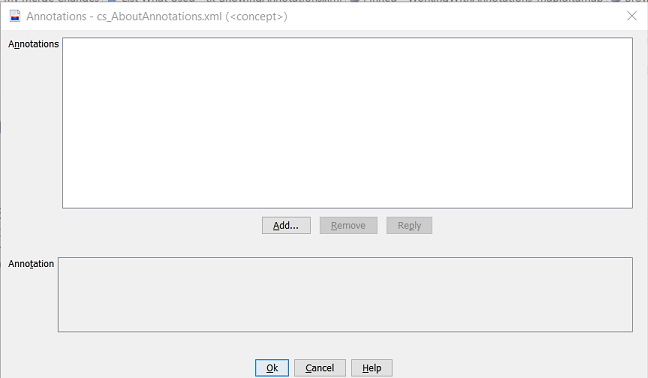
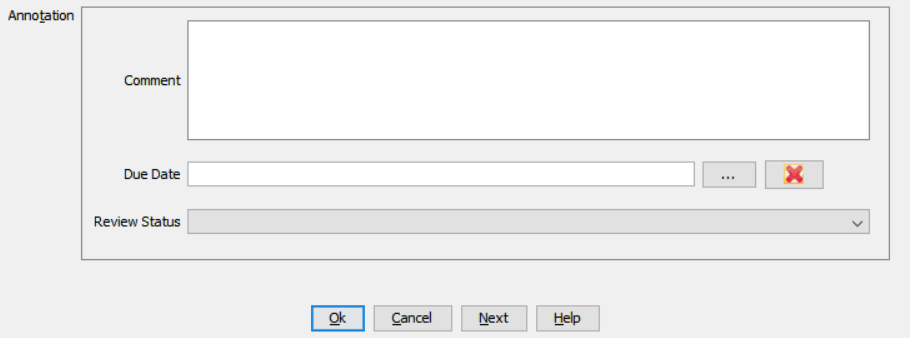
- Below the Annotations box, click Add and, if prompted, select the annotation type from the list, then click OK.Note: If only one annotation type has been defined in your repository, that type will be selected automatically.In the Annotations dialog, the Annotation box displays the fields defined for the annotation type selected.
- Navigate to the object or element in the Navigation view or a Details view.
Once an annotation has been saved in the repository it can be viewed and managed in the Browse view, Reviewer interface, or by a Show Annotations command, regardless of the method used to create it.